Basic Mala Stringing
This is a simple step-by-step tutorial that will show you the basic technique used to string you Make it Yourself Mala. Scroll down for instructions on attaching a tassel.
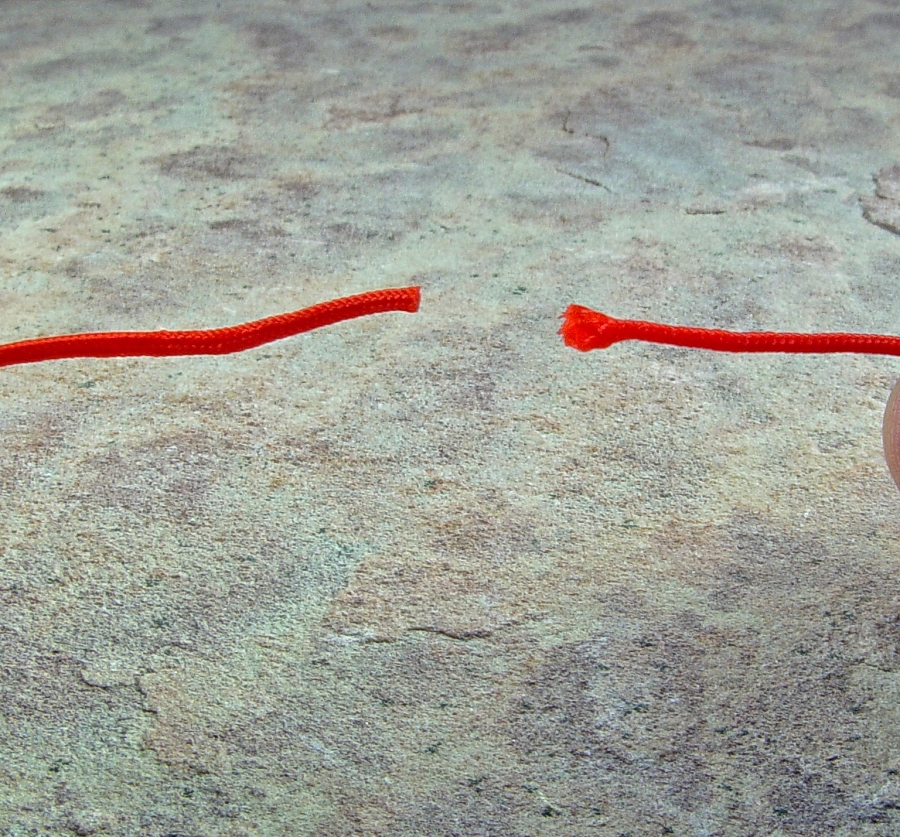
Step 1
You will want to wet and smash/fray the end of the cord. This will allow the cord-tip to enter and pass through the beads a lot more easily.
Step 2
Capture just the tip of the cord with the cord-puller and snug it up against the bead hole. Depending on the size of the bead hole you will need to capture more or less of the cord tip. The smaller the hole is capture less of the tip – even a half or quarter of the tip.
Step 3
Once you have the first bead loaded and the cord tip snugged up to it you can go ahead and load more beads onto the cord puller.
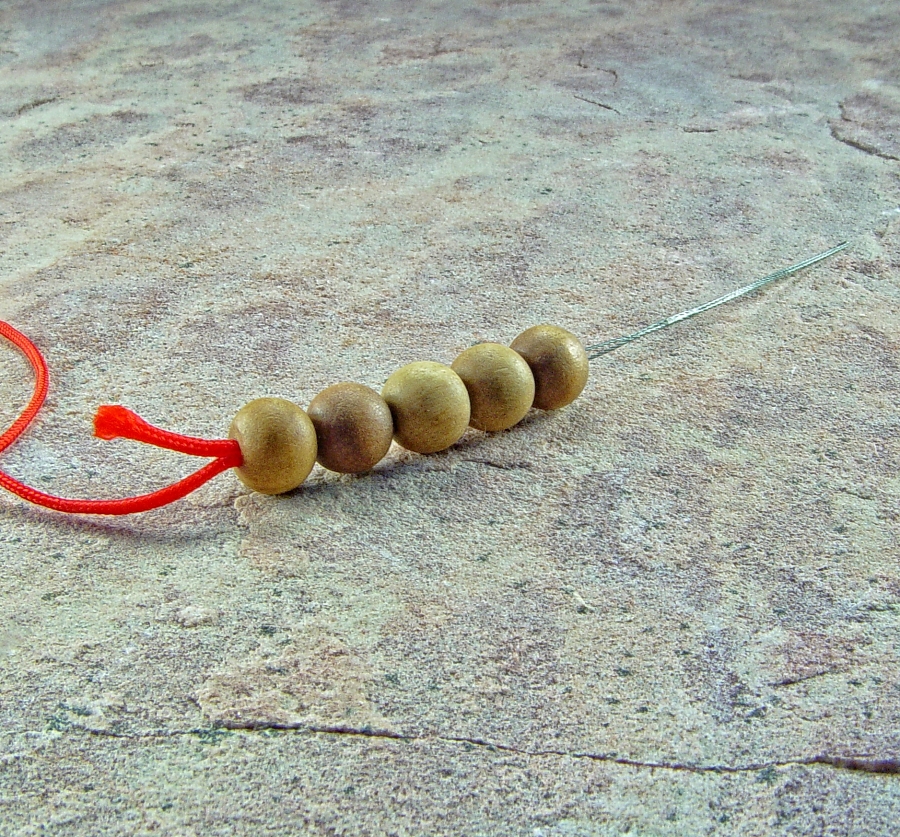
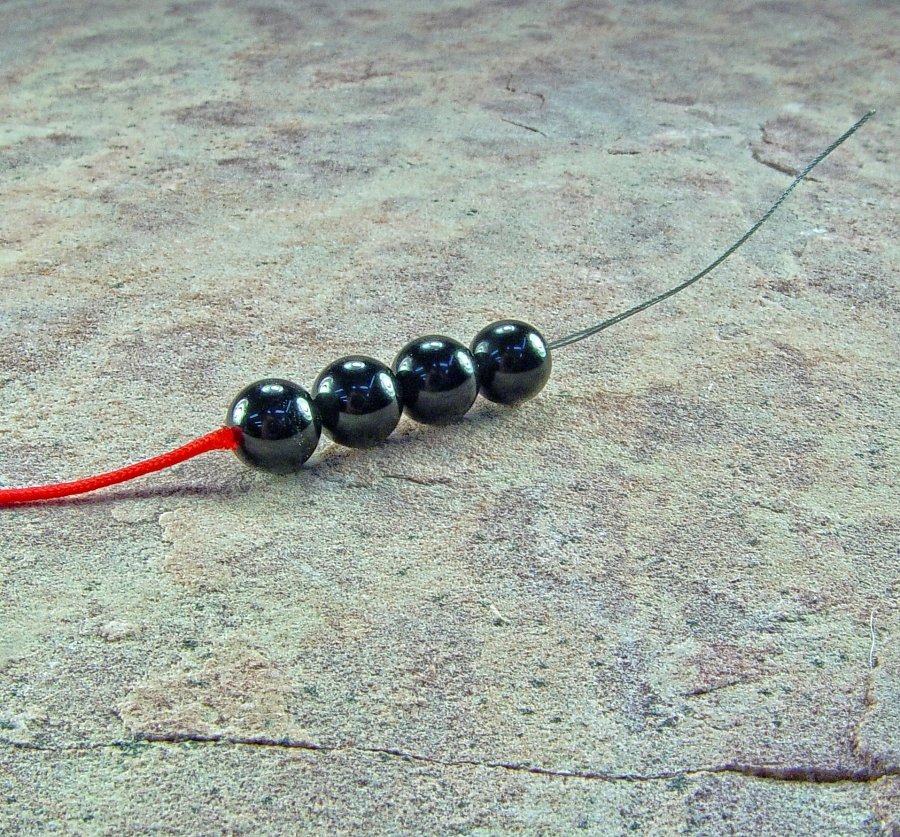
Step 4
Using a pair of pliers start to gently pull the beads onto the cord. The idea is to always have the cord-tip embedded in a bead so that you can pause to load more beads onto the puller. The goal is to never have to re-capture the cord tip, but you might need to as every now and then it slips.
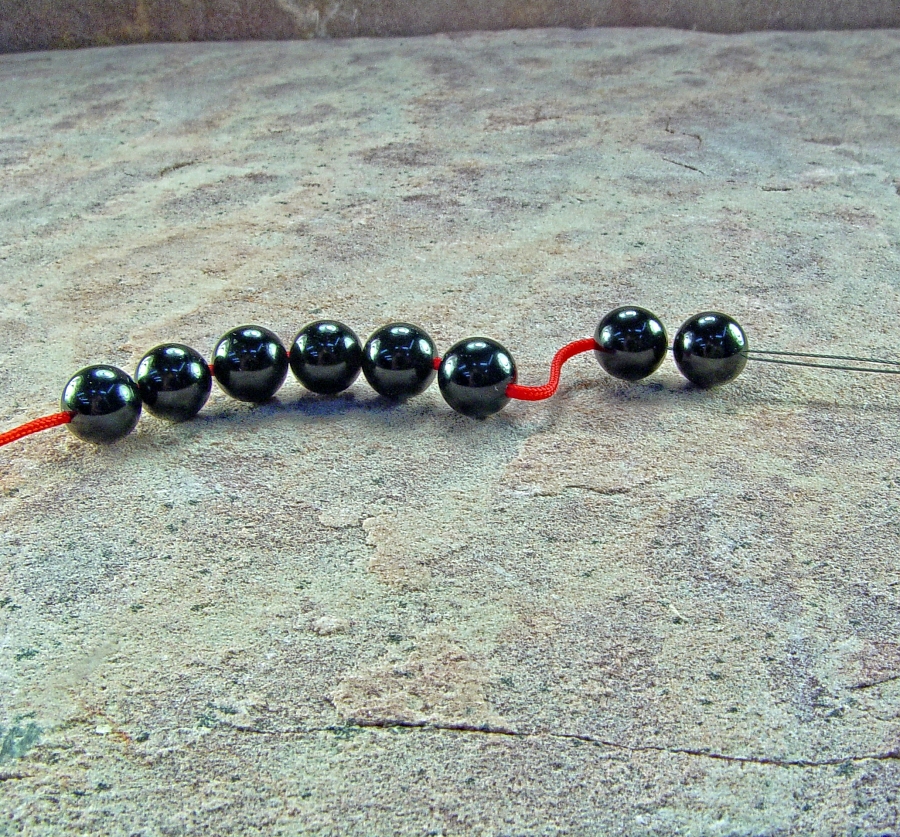
Repeat this until all 108 beads are strung. The two pictures in this step show the difference between stringing on wood beads vs stone – with wood you can pull more than just the tip through because the holes are larger.
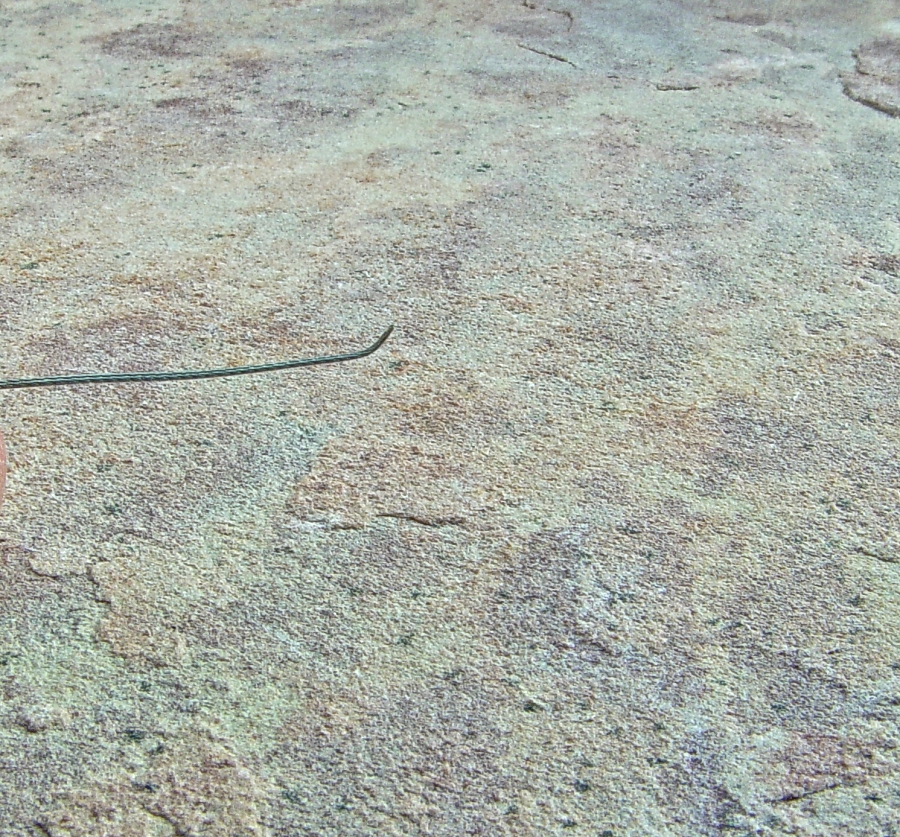
(if your cord puller breaks hopefully you opted to buy the 5pk of extra ones!)
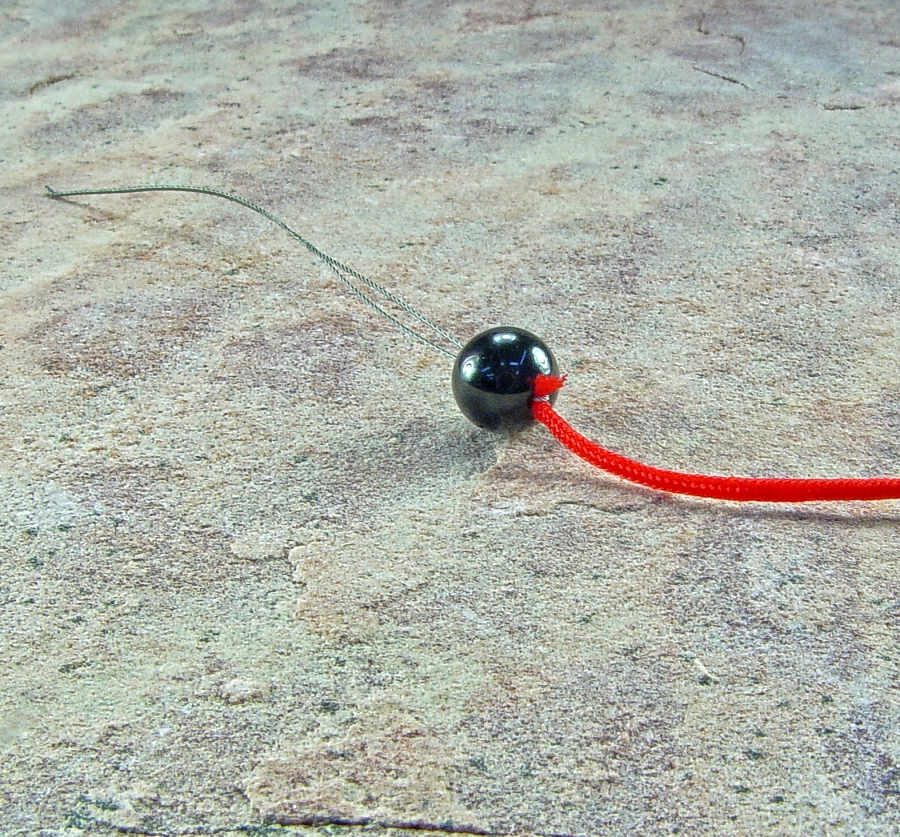
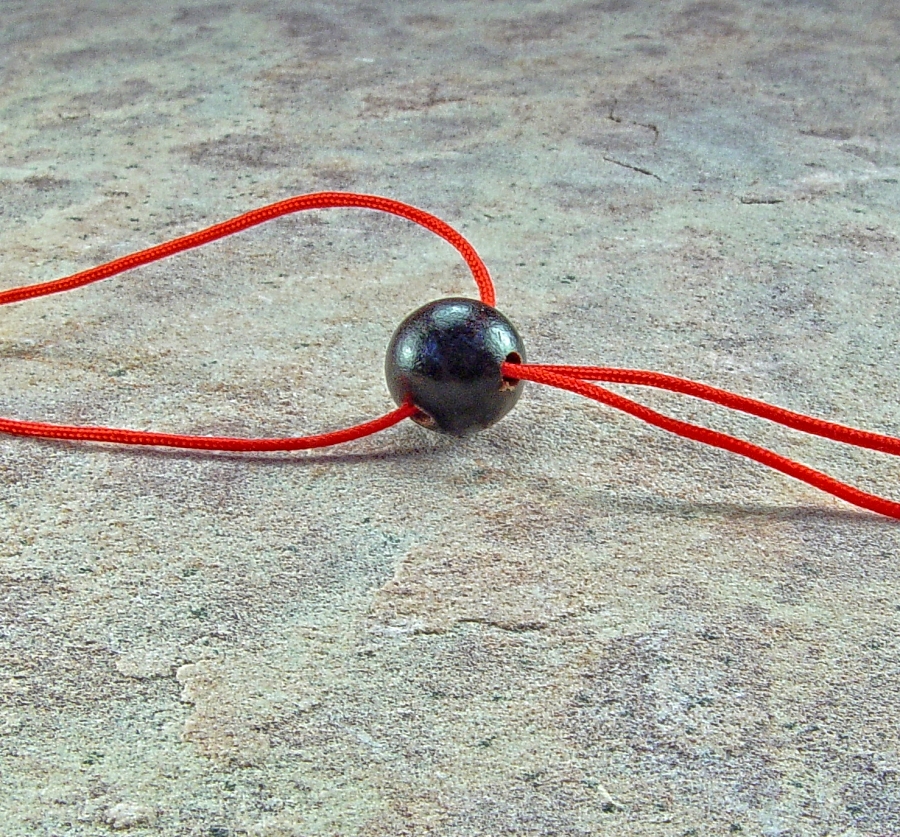
Step 5
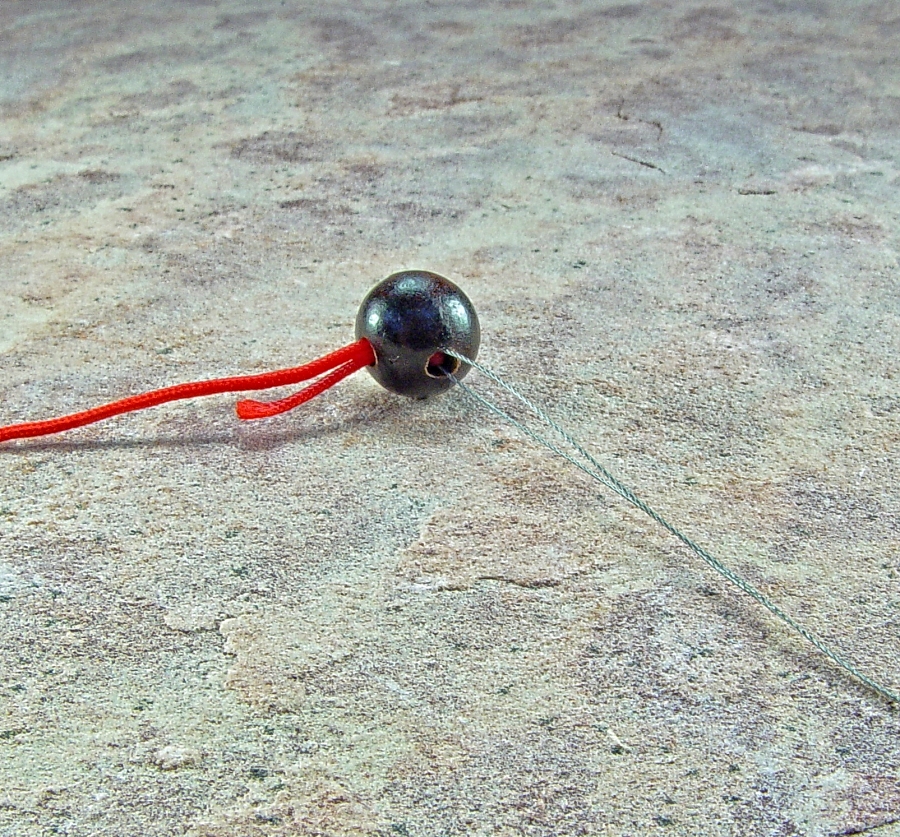
The next step is to string the guru bead. The cord puller should have come with a small bend in the tip. If not go ahead and bend the tip like pictured. This angle will allow you to navigate the 45 degree turn inside the guru bead.

Step 6
Feed the cord puller through one of the side holes and out the “down” hole. It should exit the hole that the tassel/charm would hang from.
Step 7
Just like with the main beads capture the cord end with the loop of the cord puller. Again, the amount of cord you need to capture will depend on the hole size in the bead. You might need to capture just the tip again.
Step 8
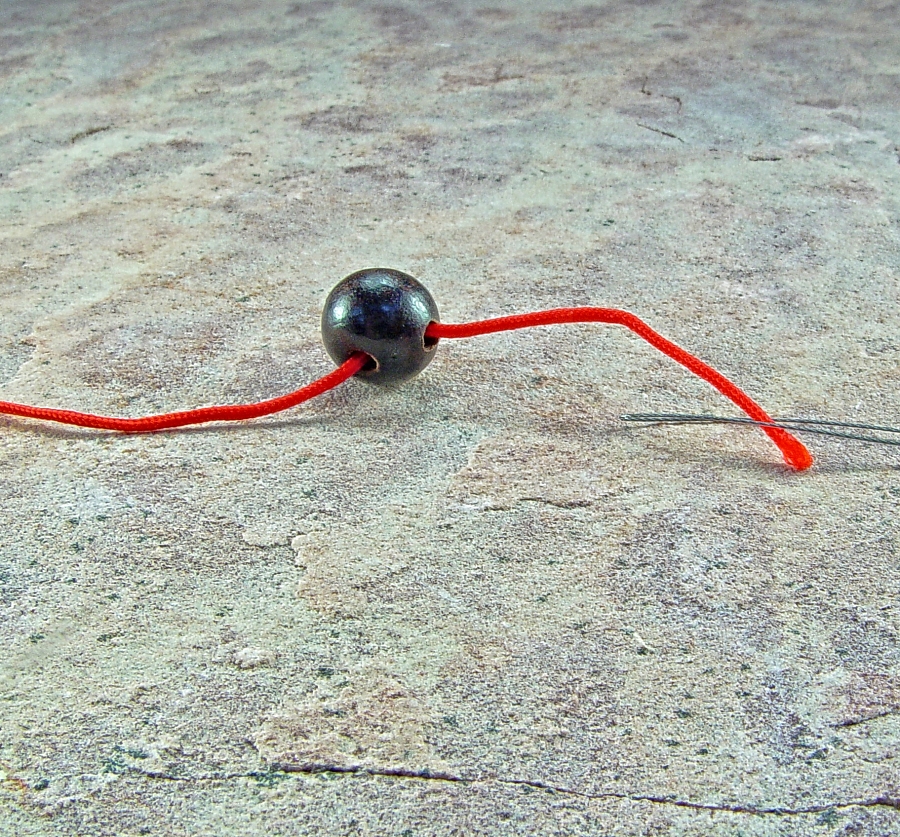
Pull the cord all the way through the guru bead.
Step 9
Pull the other side of the cord through the other side of the guru bead in the same manner.
At this point your mala is strung and just needs to be finished with a tassel or a charm. The steps below will show you how to add a simple tassel made from embroidery floss.
Attaching a Tassel
This is a simple step-by-step tutorial for adding an integrated tassel to a Mala. The cord that is used to wrap/secure the tassel can either be some of the same cord that came with your DIY Mala Kit or you can pull a strand of cotton cord from the pre-started tassel itself. I use red cord in this tutorial to give contrast. This same method can be used to secure a charm to your DIY Mala.
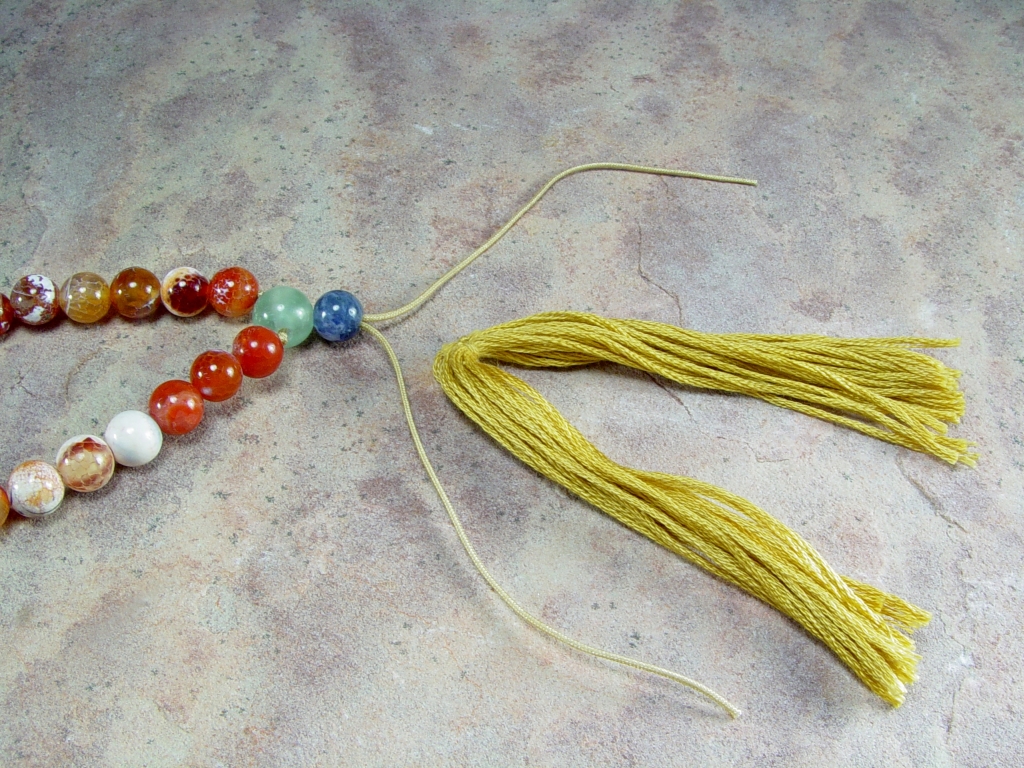
Step 1
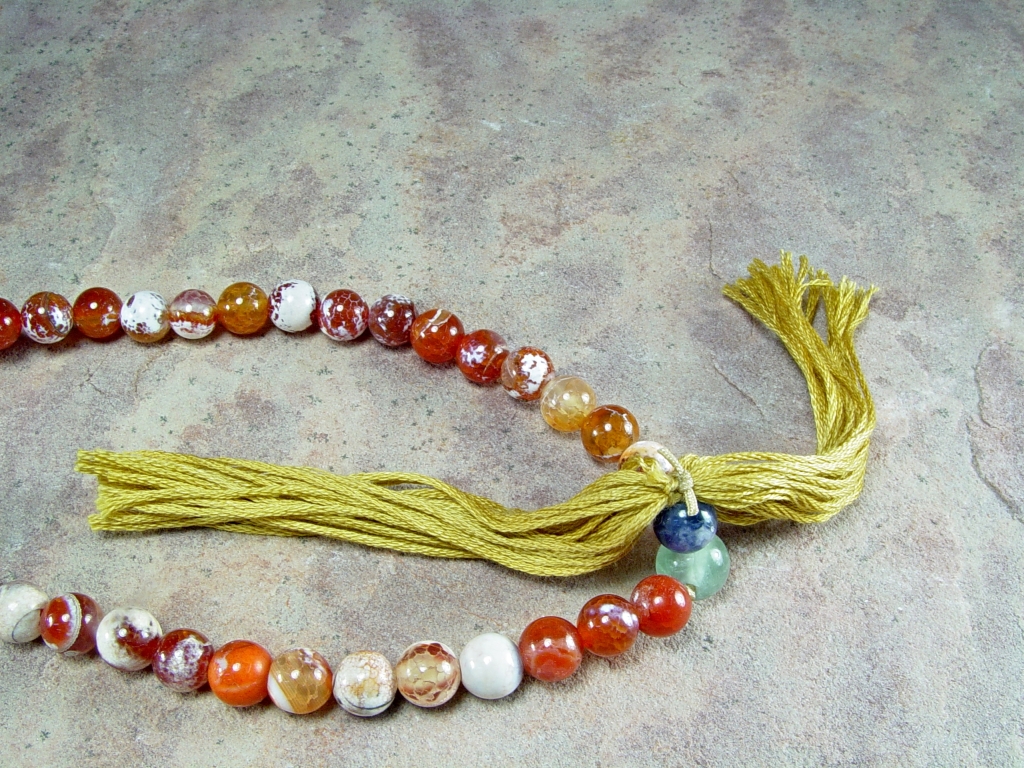
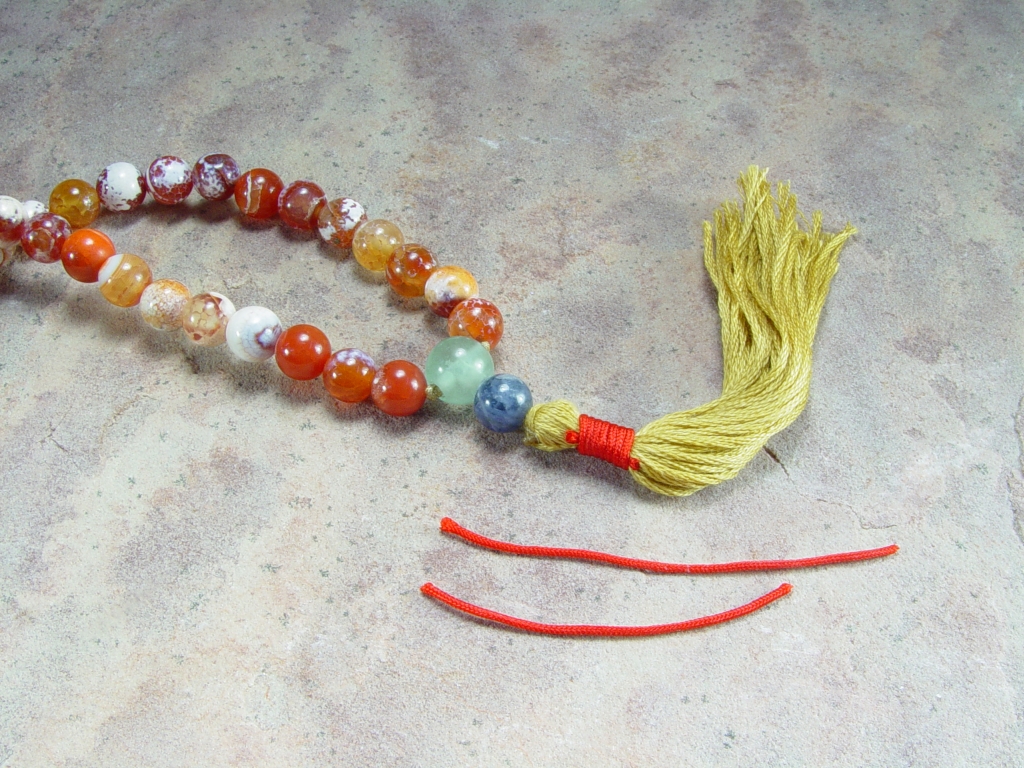
This is simply a picture to show the unfinished tassel that came with your DIY Mala Kit next to the almost-finished mala. This shows the appropriate cord length to attach the tassel.
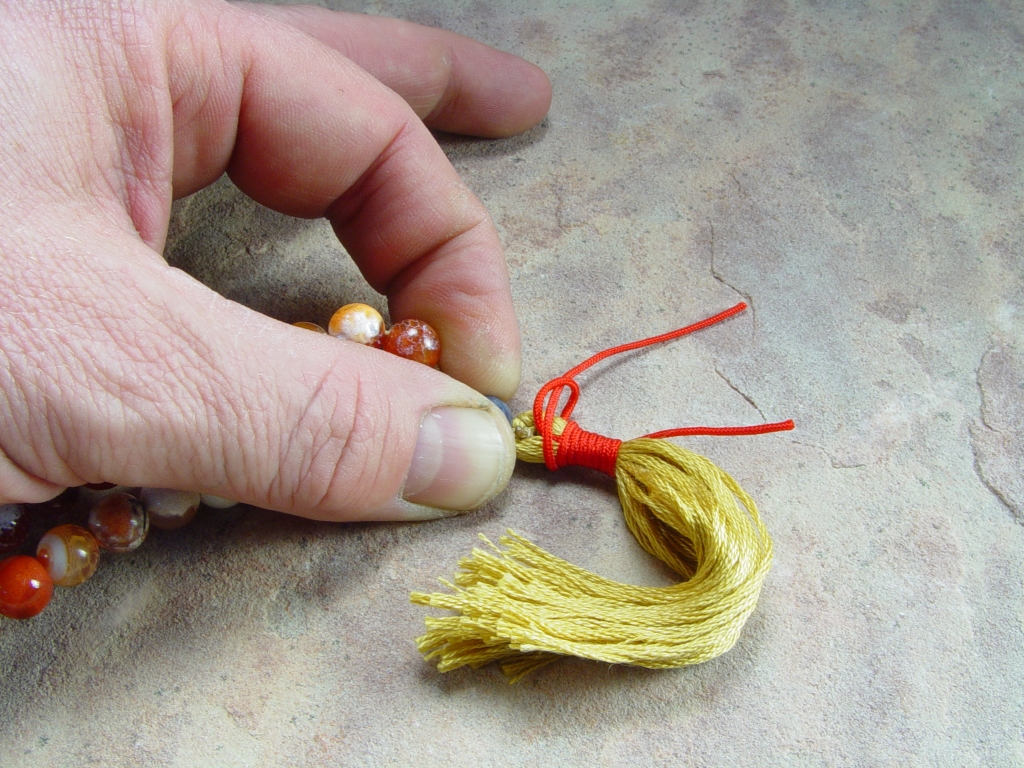
Step 2
Place the unfinished tassel evenly in the guru bead/extension bead cradle.
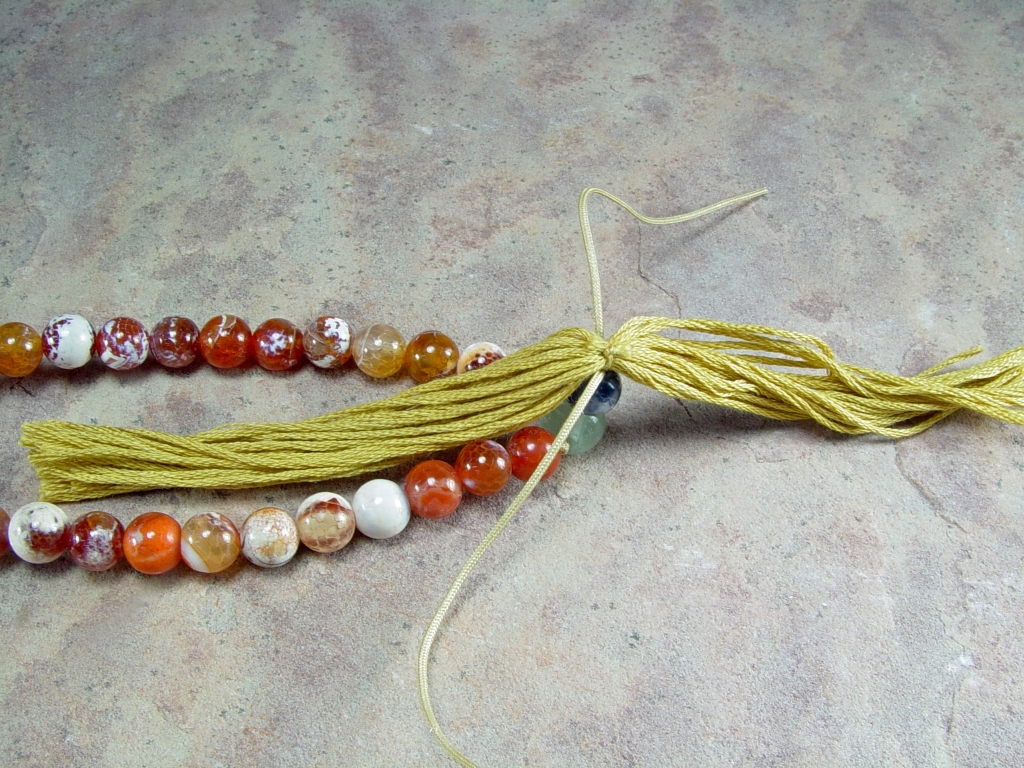
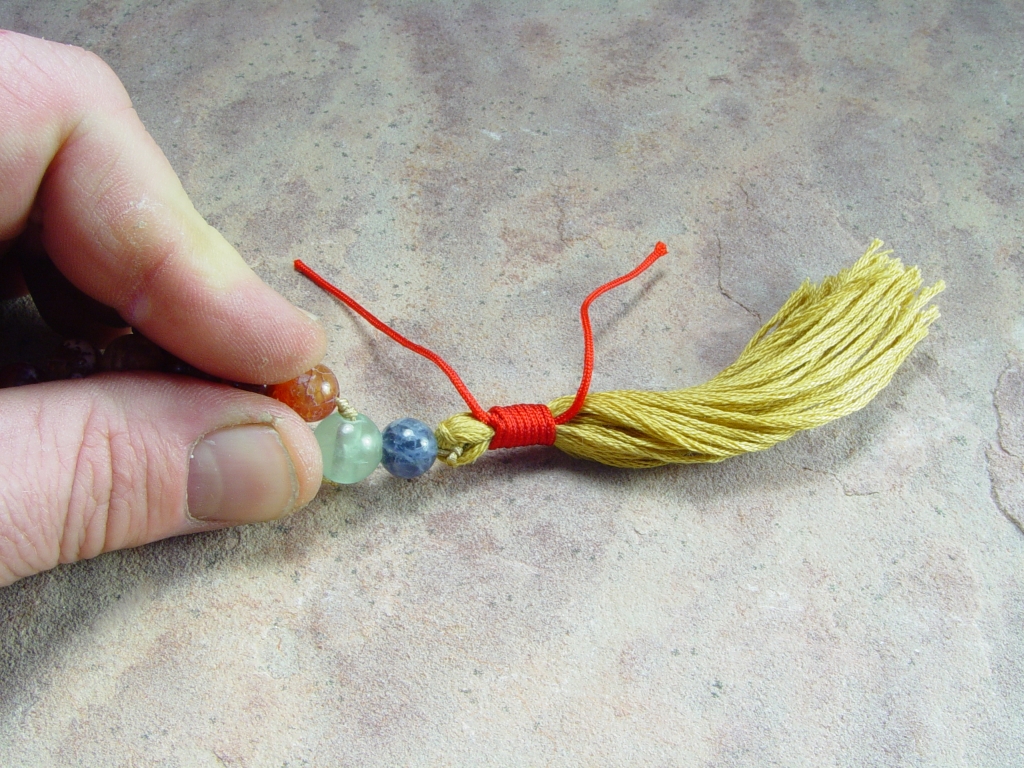
Step 3
Tie a square knot around the tassel with the mala cord. Tie this as tight as you’d like your mala to be.
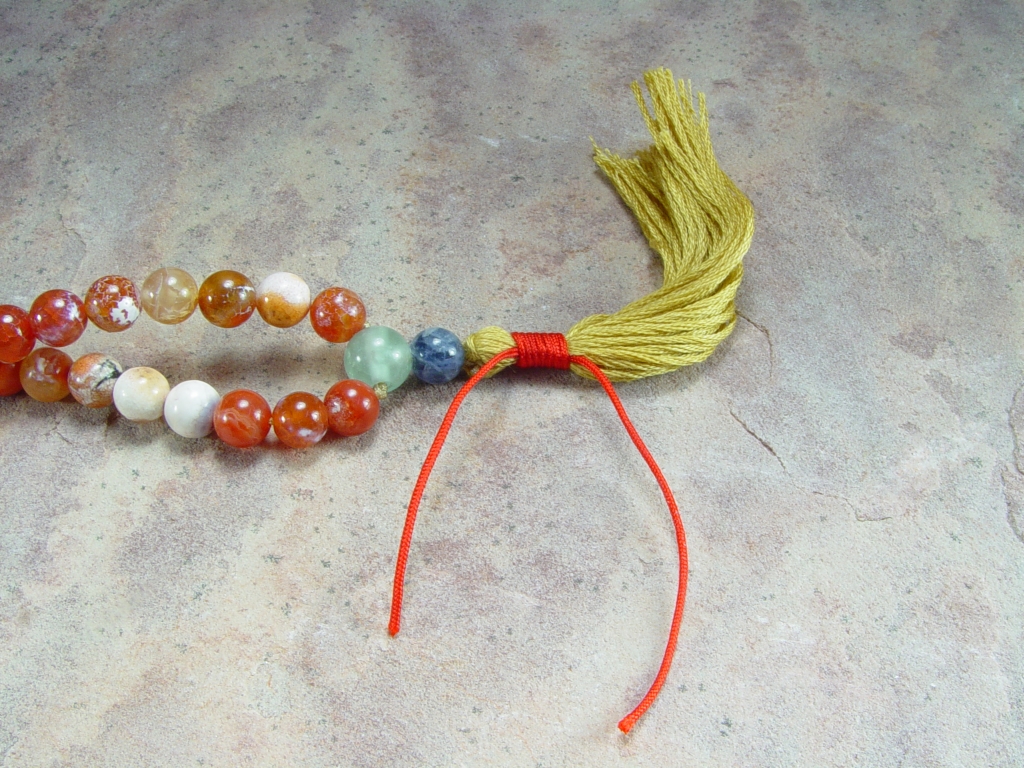
Step 4
Cut the loose cord-ends leaving about 1/8″ cord.
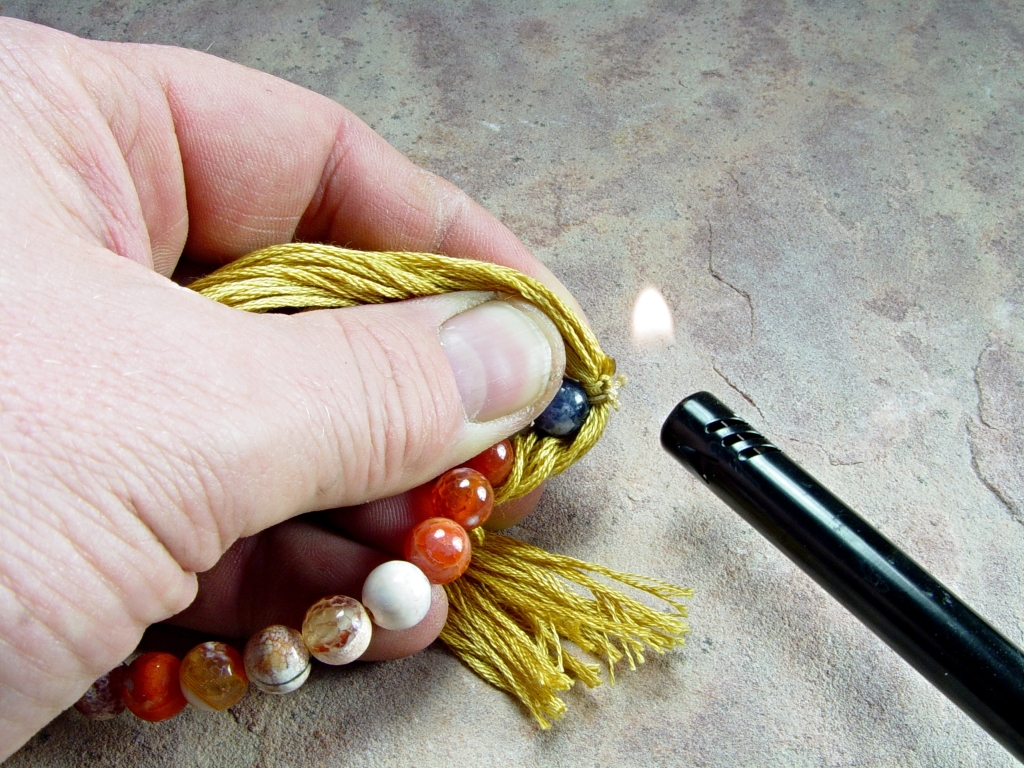
Step 5
Using a lighter (I get mine for $1 at the Dollar Store) *carefully* melt the cord ends down. The cord is nylon so it will melt forming a very strong melted nylon bead. Optionally you can apply glue here. I don’t recommend this though as it can make a mess – go to the Dollar Store and get a lighter!
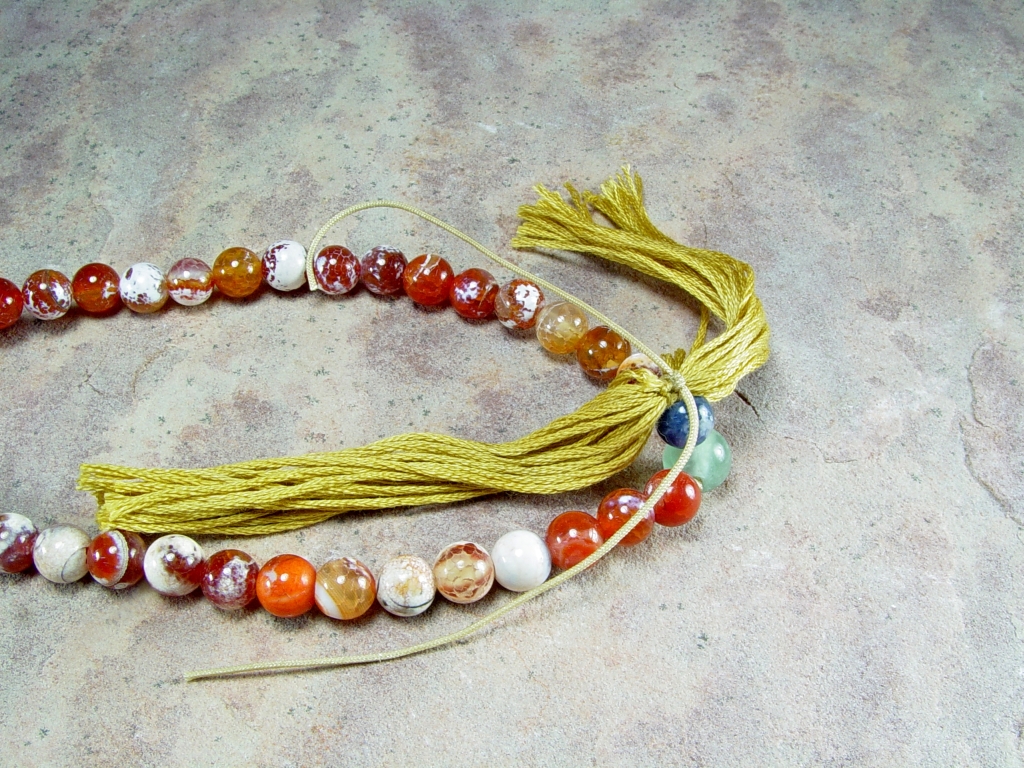
Step 6
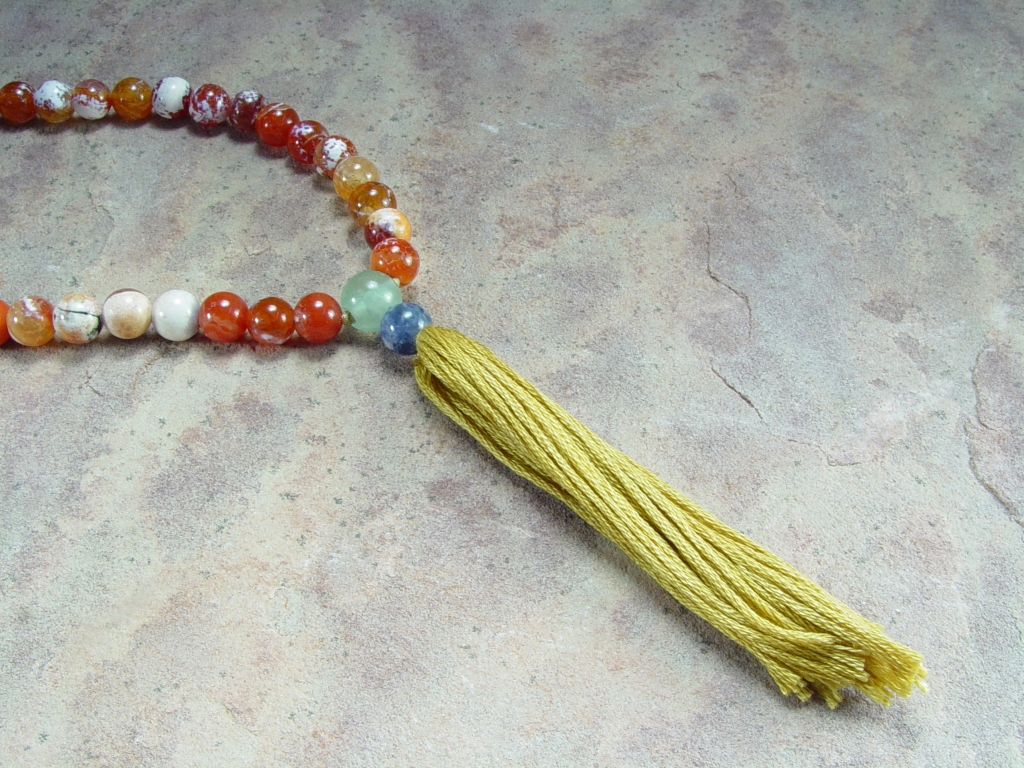
Neatly form the tassel over the knot
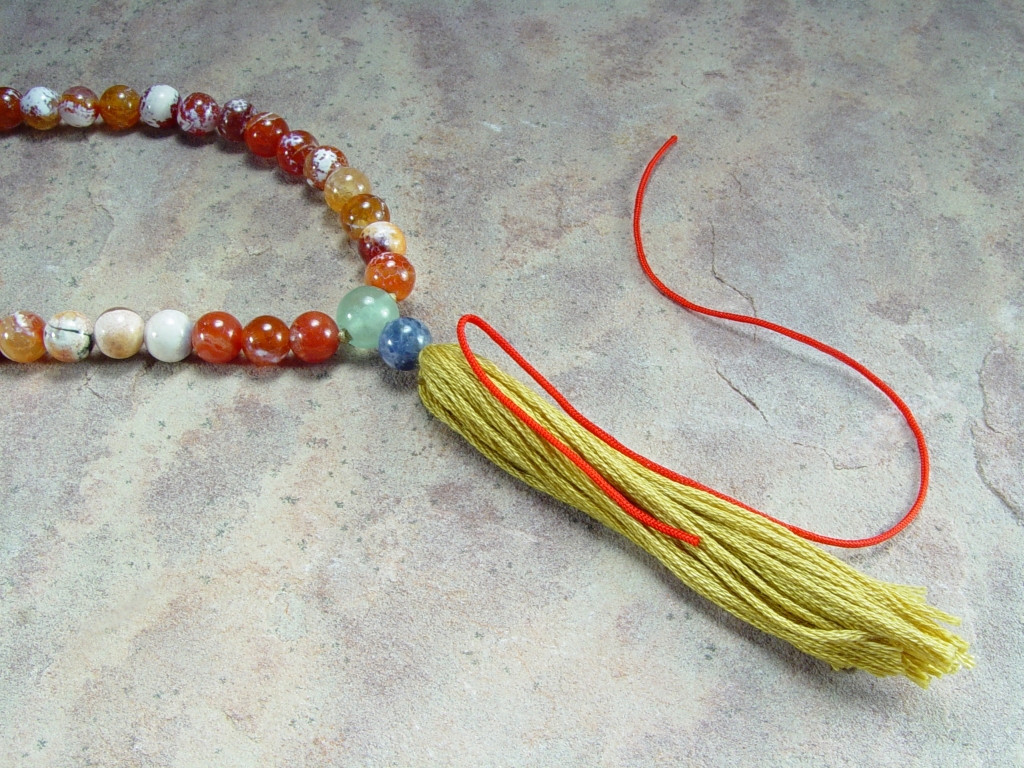
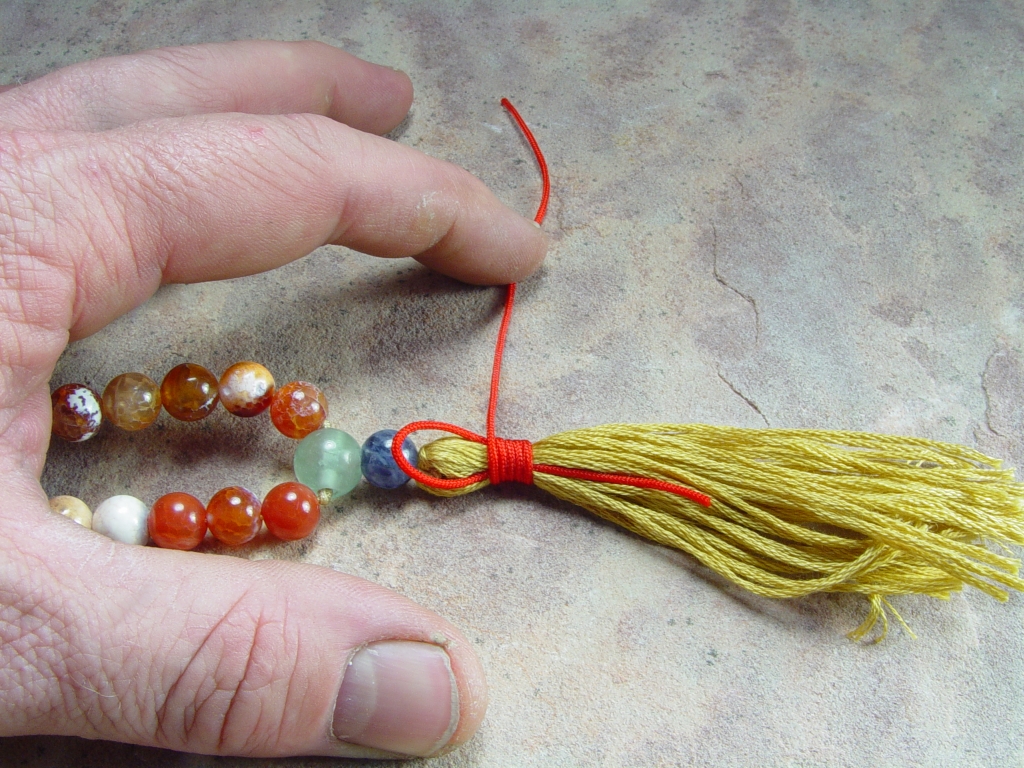
Step 7
Place a loop of cord upon the unfinished tassel as pictured.
Step 8
This is the tricky part!! Starting at the bottom of the tassel start to tightly wrap the cord around the tassel and cord-loop up toward the guru/extension bead. Don’t get frustrated! You can start this step over and over until you get it like you want it if you desire.
Step 9
When you get the securing loops to the top of the tassel pass the cord end *through* the loop at the top.
Step 10
Pull down on the cord-end toward the bottom of the tassel. This will draw the loop down and capture the upper cord end. Be sure to keep everything tight during this step.
Step 11
Continue to pull the bottom cord-end and draw the loop/upper cord-end *under* the loops. Do go too far though- just enough so that it is tight and secure.
Step 12
Carefully snip off the cord-ends. At this point you might want to use your Dollar Store lighter to gently melt down the cord ends.
Attaching a charm is much the same as a tassel. Instead of tying that looping knot around the tassel you’d tie it around the cords that go through the charm itself.
You can see a few videos I’ve put together about all of this here on YouTube: My YouTube Channel.